Thursday, 30 April 2020

Premise: Character Design (Part 6)

I continued with trying to finalise the two main characters, Kris and Evie. I aim to get their colour palettes to work with each other and to find a balance that I enjoy. For Kris' colour palette, I will likely proceed with the third or fourth palette with the fourth hairstyle. 

I will then work on fully finalising Kris' design by focusing on smaller details such as a shirt pattern. I will probably work more with Evie's colour palette to produce something that is distinguishing enough from Kris' design (as brown is a colour that is used for both of them) while still creating a visual connection between them. 

I have also moved on from using four-fingered hand designs for the animal characters to five fingers.


Premise: Breakdown (Version 1)

I attempted to break down the ideas for the story that I have so far and to write it as something slightly more coherent. I started off by drawing from the personal experience that the story is based off of (moving schools when I was younger) as a foundation and then working on changing certain elements so it flows better in a narrative sense as well as exaggerating and tweaking traits of different characters. For example, having Kris and Evie's personalities be opposites; Kris is timid and shy whereas Evie is clumsy and bolder. 

Premise: Prop Design (Part 1)

While designing the school, I found it easier to begin by designing the props that would go into the room. It is unlikely that I will use all of them, but I decided to put consideration into what would typically be seen in a school or classroom to help me understand the layout of the rooms better. Designing the props also helped me to figure out the kinds of colour palettes that I want to use as well.

Wall decorations and posters


Furniture


Toys and equipment


Pencil cases


Bags


Lunchboxes


Ceiling decorations


Food


Stationery


All completed props


Monday, 20 April 2020

Saturday, 11 April 2020

Toolkit 2: Animation: Acting and Animation (Part 3)

After looking at the breakdown poses, we moved onto re-timing and using the graph editor to polish the animation a little bit. This is what it looked like when played normally and the blocking was taken out to generate a flow between the frames:


This is what it looked like after I attempted to retime the animation:


This is the result after using the graph editor:

Toolkit 2: Animation: Acting and Animation (Part 2)

After the key poses, the breakdown poses were put in. This means that instead of gliding across the panels, the character now appears to step over them:


Here is a version where the button is pressed downwards with the animation:

Toolkit 2: Animation: Acting and Animation (Part 1)

These are the key poses for the animation in which the Moom character has to reach the 'goal', which in this case, is a button. 

Wednesday, 8 April 2020

Toolkit 2: Mudbox Tutorials (Part 5; Complete)

Opening the 'Pose Tools' toolbar.


Adding a single joint to the base of the ear to be able to create folding and twisting movements later on.


Unfortunately, the 'Create Joint' tool was continuously glitching and the pivot would spin the head at a 90 degree angle to the helmet, eyes, horns, and teeth models - attempting to move the pivot or pose the ear did nothing. 


However, when creating joints, they should usually attach to where the joint was drawn, and the amount of falloff weighting should be designated by how far the green arrow is pulled forwards or backwards. This determines how much of the geometry will be affected around the joint when it is posed or altered. The pivot point can also be changed to affect how geometry moves while still preserving the weighting that was put into place.

Weights can also be painted onto the model using the 'Weights' tool. this helps to manually adjust what geometry is affected by the movement of the joint. The 'Ctrl' key will erase painted weights when held while using the 'Weights' tool, again acting as an inverse function button.

If the 'One joint at a time' box is unchecked, multiple joints can be created in a piece of geometry. In the tutorials, three joints are placed into the right ear so it can be moved in more diverse ways compared to the left ear. 

Individual poses created using the 'Pose' tool can also be saved and edited using a pop-up box. Posing allows geometry to be manipulated, translated, scaled, and twisted.

Moving on, the example model was used to look at how lighting works in Mudbox. When rendering, all objects are turned up to the highest level of subdivisions that they have. The lights can also be switched on and edited - particularly by holding the 'L' button and dragging the mouse or stylus around to position the way in which the light falls onto the character.


Turning on the 'Cast Shadows' option allows shadows to be cast on the character model as a result of the lighting. The quality of this shadow can also be adjusted to have a finer outline if necessary.


The 'Create' menu allows users to create different lights for a scene. The 'Point' light envelopes a scene in one light that shines in multiple directions, functioning in a somewhat similar way to the 'Skydome' light in Autodesk Maya. The 'Directional' light simply shines in a single direction. 'Image Based' lights help to increase the quality.


Turning on the example rim light and increasing its intensity, before positioning it.


Turning on and adjusting the intensity and position of the example image based light.


Making changes to the skin and helmet materials.


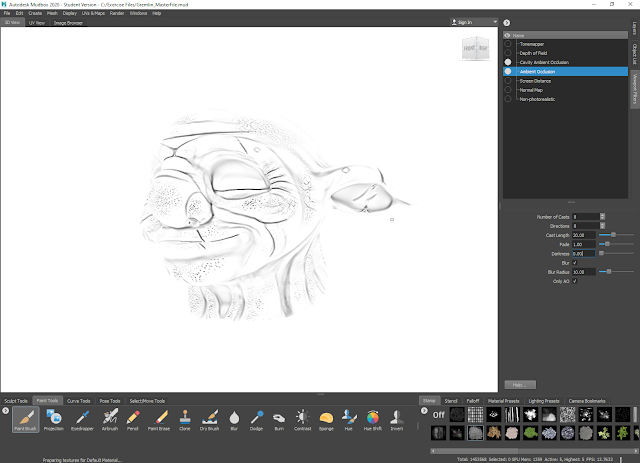
Looking at viewport filters, starting with Ambient Occlusion.


Making changes to the Ambient Occlusion filter by changing the 'Cast Length' and 'Darkness'.


Cavity Ambient Occlusion is then turned on as well to highlight the finer details on the mesh.


Increasing the quality of the Cavity Ambient Occlusion from 'Good' to 'Best'. 


Turning on both the Ambient Occlusion and Cavity Ambient Occlusion on for the mesh.


Looking at the Tonemapper viewport filter.


Changing the Tonemapper filter settings; this is done by altering the 'Gamma', 'Luminance Max', and turning off both 'Adaption' settings afterwards.


Looking at the 'Depth of Field' viewport filter. Turning it on blurs the camera.


Changing the 'Depth of Field' settings so it is appropriate to render out.


The 'Screen Distance' viewport filter acts as a pass that can be rendered out by itself.


Returning to the 'Depth of Field' settings again.


'Save Screen Image' is one rendering option that allows an image to be saved at the specified resolutions and file type.


Rendering out two versions of the character:


Both results:


Moving on by looking at the 'Create a Turntable Movie'. This allows a turnaround of a character to be rendered out of the software, and the amount of frames as well as frames per second can be changed depending on how long the user wants the turnaround to be.


The 'Record Movie' option will allow the user to record their screen to view their modelling, texturing, or other processes in the software.


Models can be imported into and exported out of the software in various different formats including FBX, MUD, OBJ, and custom formats. The model can also be exported directly to other software including Autodesk Maya and 3DS Max. When doing this, different preferences can be set in a pop-up box that allows the user to customise how exactly they want the mesh to be exported. Textures and paint layers can also be exported alongside models.


For textures specifically, there is a variety of ways in which they can be exported. By right-clicking on layers, options revealed include 'Export Selected', which will export only the selected layer(s), 'Export Group Merged', which will export the selected group as a merged file, and 'Export Channel Merged', which will export the entirety of the selected channel. Exporting can also be done directly as a PSD document (either in a live bridge connection with Photoshop or separately).


Texture maps can also be extracted through the 'UVs & Maps' and 'Extract Texture Maps' menus.


All paint layers can be exported separately as well by going to the 'File' menu and choosing the 'Export All Paint Layers' option. It functions similarly to the 'Set Project' function in Maya, and will export paint layers to Mudbox's default directories unless specified otherwise by the user. It also allows users to choose whether they want these files to be named, and whether the user wants the files to be separated or merged together.


Toolkit 2: Mudbox Tutorials (Part 4)

Isolating the head to paint onto it.


Creating a new paint layer.


Selecting a colour to use for the base of the character.


Choosing the 'Flood Paint Layer' option, which acts similarly to a fill bucket option and covers the entire mesh.


Extracting an Ambient Occlusion texture map for use on flat lighting to better see facial details when painting.


Turning on the 'Flat Lighting' mode by right-clicking and toggling it on.


Turning on Ambient Occlusion to compare it to Cavity Ambient Occlusion.


Viewing the Cavity map on the character model.


Placing the Cavity map on 'Multiply' mode so it shows up efficiently on the 'Flat Lighting' mode when painting.


Returning to 'Flat Lighting' mode with the Cavity map.


Adding a lighter texture around the eyes to act as a contrast to the base colour.


Adding 'temperature' to the face by applying red and blue hues around the mouth, eyes, nose, and cheeks. 


Moving onto using the 'Projection' brush in order to give texture to the skin.


Opening the helmet in an orthographic UV view. This allows for the metal banding to have the 'Projection' brush applied to it as well.


Once the helmet is back into its perspective view, the seams of the texture are painted over in efforts to blend them.


Right-clicking the layer modes to see which ones are available for use opens a drop-down list.


Returning to the gremlin model and using the 'Adjust Colour' function to shift the hue, saturation, values, and curves of the colour.


Changing the layer mode to 'Overlay'. 


Adjusting the overlay's colours and changing the opacity of the layer.


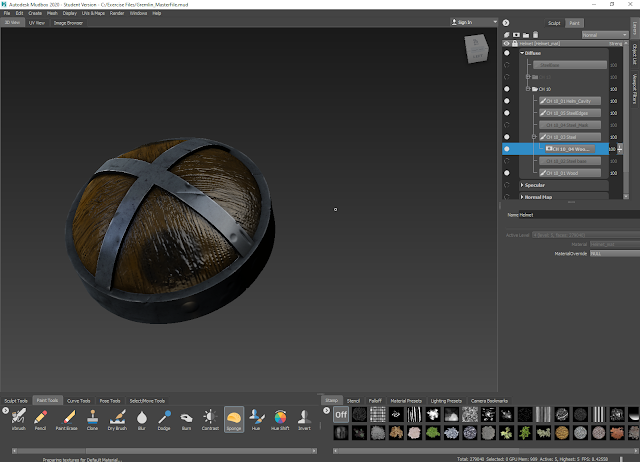
Returning to the helmet to adjust the steel banding colour using the same methods.


The next tutorial uses the example helmet to explore how masks function.


Opening the example mask file in the image browser.


Opening the mask texture on the model.


Applying the mask to a layer.


Using the 'Inverse' preset in the colour adjustment menu to reverse the colours.


Reapplying the texture.


Duplicating the layer and reversing its colours back to their original state, and then applying the it to the wood layer.


Additional work was completed on the painting of the character model:


Soloing a duplicate of the textured skin layer and using the colour adjustment menu to switch to the 'Black and White' preset.


Moving the layer to the 'Bump Maps' section and its result:


Reversing the dimpled effect by selecting the Bump map layer and returning to the colour adjustment menu to select the 'Inverse' preset and switching the original textures back on.


Reducing the opacity of the Bump map layer.


Retrieving a Normal map from the Bump map created and the result:


Opening the horns and helmet models to paint cracks onto the horns. The 'Randomize' and 'Stamp Spacing' functions are also utilised to give a more natural appearance. 


Setting the layer mode to overlay after applying the cracks.


Adding contrast to make the cracks stand out even more.


Creating a duplicate and then making a Bump map from it to add more subtle effects to the texture.


Using the 'Dry Brush' tool to add scrape effects to the helmet. This also allows the cracks and dent marks in the metal banding to stand out more as well.


Exporting the example dodge layer to open the live bridge between Photoshop and Mudbox. 


The file opened in Photoshop:


Adjusting the levels on the map.


Changing the hue and saturation.


Using an unsharp mask to sharpen the features of the mask before exporting it back into Mudbox.