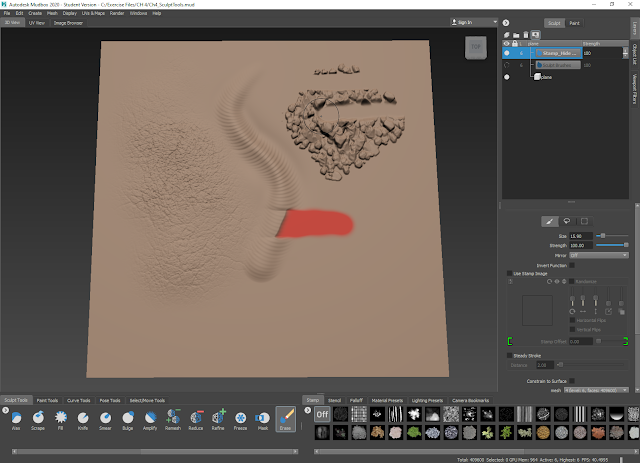
Opening the model.
Using the sculpt tool to understand how pen pressure works when sculpting.
Changing brush sizes and using the 'Inverse' function. This can be done by holding the 'Ctrl' key when sculpting, or it can be located when selecting a tool and turned on by checking the box.
Smoothing can be done by holding the 'Shift' key when sculpting. This gives the edges of the sculpting a softer look and helps to blend shapes.
Mirroring can be done when selecting a tool as well. Clicking on it will open a drop down list where the type of mirroring can be chosen - in this case, work was done in the 'X' axis mirror.
The horns, even though they are separated, are part of the same mesh as they've been combined. This allows for them to function as one object when working with them with the mirror in the X axis switched on.
The 'Steady Stroke' tool can also be switched on. This acts somewhat as a stabiliser when sculpting.
Looking at each of the different tools:
Turning on the mask layer and using the 'Mask' tool while holding the 'Ctrl' key to rub out part of the mask as a demonstration of how the mask tool works.
Using the 'Eraser' tool to demonstrate what it does.
Using the 'Freeze' tool to create a circular shape and then drawing across it to understand how it functions.
Using the 'Pinch' tool.
Selecting the 'Grab' tool and turning on its 'Twist' function to understand how it distorts shapes.
Using the 'Fill' tool to fill in one of the gouges made on the plane.
Using the 'Scrape' tool to gouge out one of the shapes on the plane.
Using the 'Smear' tool.
Opening the downloaded file and isolating the head.
Moving up by two levels, and making and naming a new layer to work on. Wireframe is turned on, as well as the mirror in X axis in the options for the 'Wax' tool.
Selecting the 'Falloff' tray to open it so it can be used later.
Working on the head by adding musculature to the cheek, head, and brow.
Adding a new layer to add slightly finer details on the face.
Opening the 'Viewport Files' tab and choosing the 'Cavity Ambient Occlusion' option.
Choosing the 'Ambient Occlusion' option.
Adding a new layer to work on the throat ligaments.
Adding two new layers for wrinkle details and to use the 'Knife' tool.
(Unfortunately, my tablet and computer wouldn't allow me to work on the finer details as much as I'd have liked to, as it kept glitching the model of the character even after I'd reopened Mudbox and reopened the file multiple times.)
Moving onto the helmet model by isolating the helmet and the horns from the head, teeth, and eye models and moving up 2 levels.
Using the 'Flatten' tool as well as the 'Scrape' tool with a stamp applied to get a 'beaten up' effect on the metal portions of the helmet. Knicks were added as well by using the 'Knife' tool, but again, I was having issues with my computer and tablet being unable to process finer details without glitching.
Adding rivets using the 'Bulge' tool, and then flattening the tops of them with the 'Flatten' tool.
Some of these rivets were also pinched to give them a bit more variety by using the 'Pinch' tool on them.


No comments:
Post a Comment